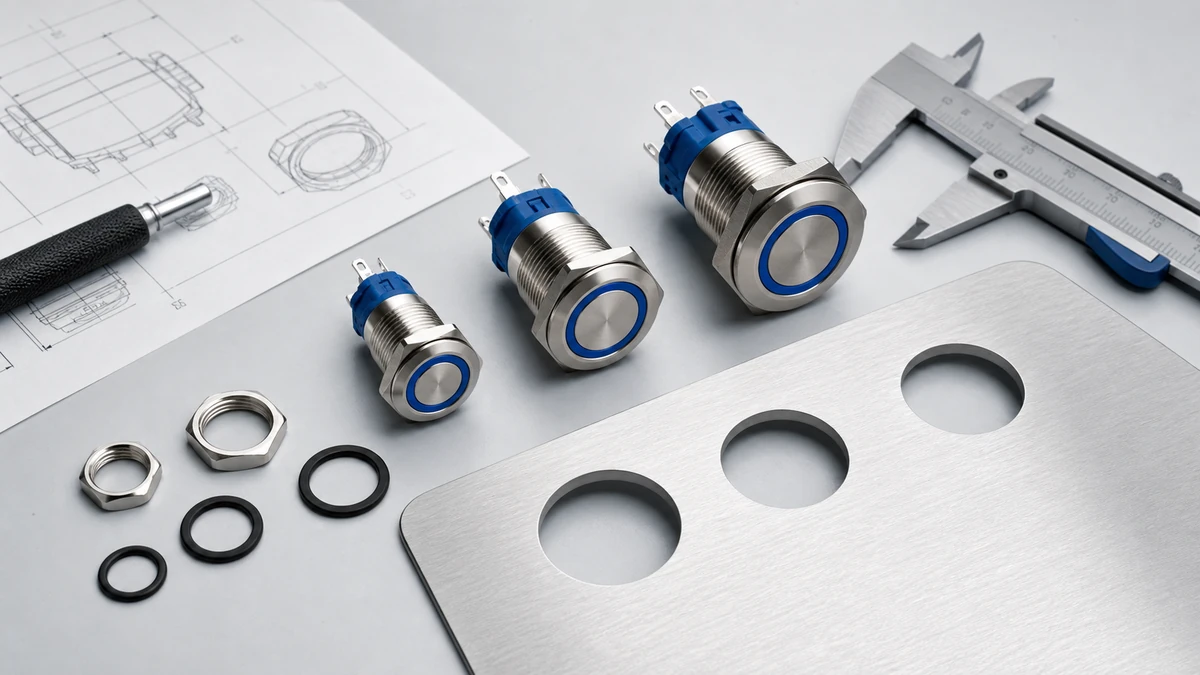
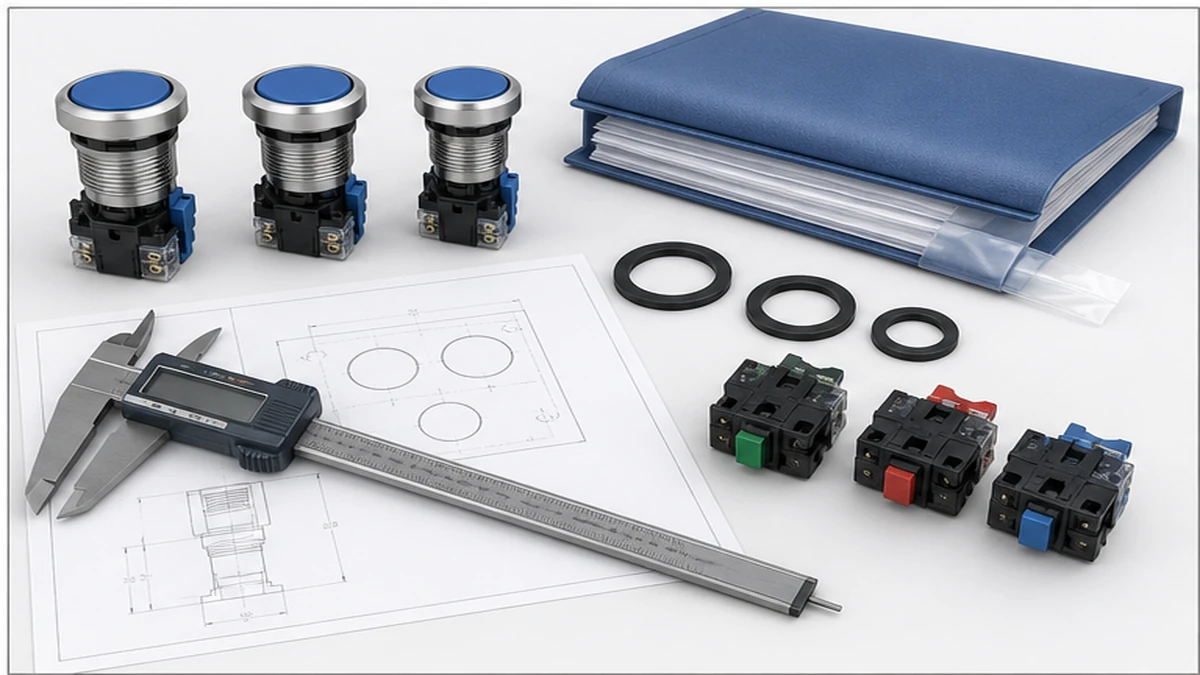
Choosing between 16mm, 19mm, and 22mm push buttons starts with one practical question: what panel cutout does each size actually need, and what else must you confirm before drilling? The nominal answer is straightforward — a 16mm push button needs a 16mm round cutout, a 19mm needs 19mm, and a 22mm needs 22mm. But the nominal diameter is only the starting point. Before punching a hole or committing a panel layout to production, you must verify the manufacturer mounting drawing, the allowable panel thickness range, the required rear clearance, and whether an anti-rotation notch or keyed feature applies to the chosen series. The sections below walk through every factor in the order a panel builder or OEM buyer needs to address it.
Specification boundary: Dimensions, contact stack, lamp voltage, IP condition, certification scope, and mounting depth must be confirmed from the current Shieldhz datasheet, drawing, and certificate package for the exact model ordered.
16mm vs 19mm vs 22mm: Understanding What the Cutout Size Really Controls
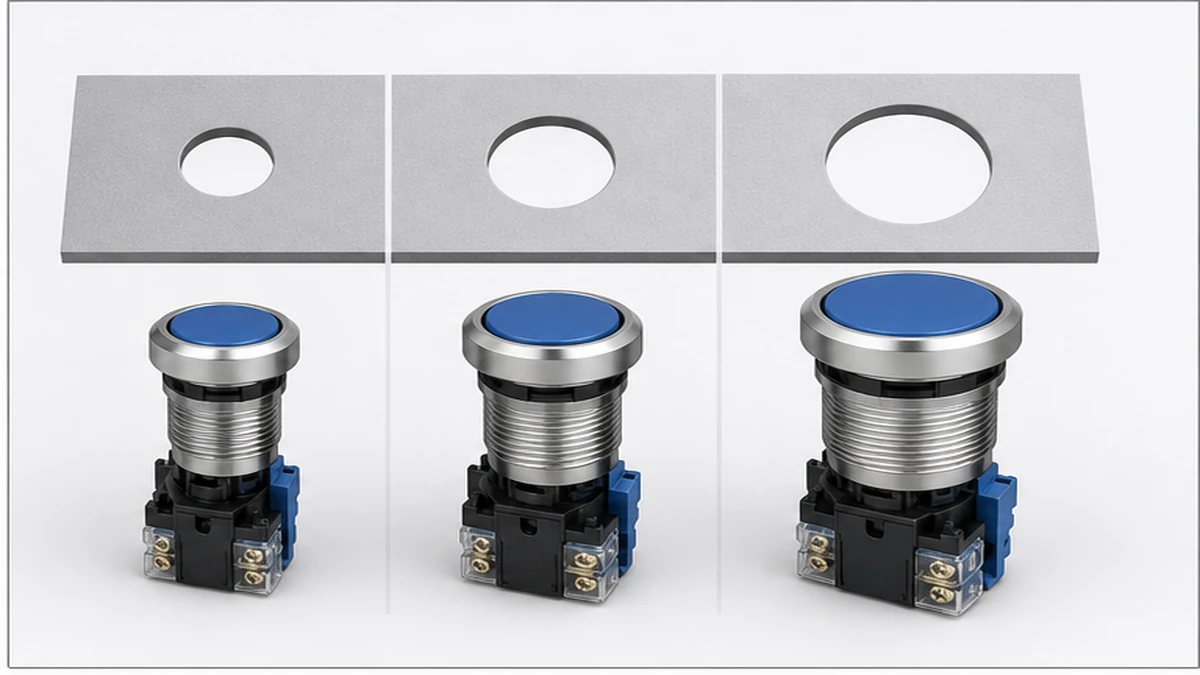
The cutout diameter does more than set the hole size. It determines the physical envelope of everything attached to and behind the operator, including the bezel outside diameter, the barrel thread, the retaining nut engagement, the sealing gasket land, and the rear accessory stack.
For 16mm, 19mm, and 22mm push buttons the differences in cutout size translate directly into differences in labeling space, finger clearance, accessory availability, wiring room behind the panel, and the overall front-panel grid density you can achieve. None of those factors are visible from the nominal cutout number alone.
Size family characteristics at a glance
Recorte
Typical application fit
Common buyer reason
Key watchouts
16mm
Compact control boxes, dense selector clusters, auxiliary stations
Small footprint, efficient panel area use
Less room for large legend plates or deep contact stacks; fewer glove-accessible
19mm
Mixed-purpose industrial panels, OEM assemblies
Balanced density and usability compromise
Accessory families, bezel options, and lamp choices vary by series; verify before mixing
Requires more front-panel area and wider center-to-center spacing
The table above reflects general design intent. Actual bezel outside diameter, thread length, and accessory compatibility all depend on the specific product series. Confirm those details from the datasheet and mounting drawing for the model under consideration before treating any column entry as a universal fact.
The space-versus-usability tradeoff in practical terms
A 16mm device saves front-panel real estate but offers limited room for large legend plates and requires more precise finger placement. That matters in environments where operators wear gloves or where the station must be read quickly from a distance. A 22mm operator solves those ergonomic concerns but needs a wider mounting grid. If you are placing multiple operators in a row, even a few millimeters of difference in center-to-center spacing will compound across the panel width and affect whether the enclosure door can close over the bezel arrangement.
A 19mm format often works well in OEM control panels where front-panel density and usability both matter but neither constraint is extreme. It is not always available in every product family, so availability of the required operator style, contact block, legend holder, and lamp must be checked for the specific series before standardizing on 19mm across a design.
For engineers comparing operator styles within a single enclosure, it is worth building a cardboard mock-up of the panel face at 1:1 scale before committing to a cutout pattern. This low-cost step reveals spacing conflicts and legend readability issues that are difficult to spot in a 2D drawing.
How to Measure and Verify a Panel Cutout Before Drilling or Retrofitting
Whether you are planning a new panel or retrofitting an existing one, a systematic measurement workflow prevents most fitment problems before they reach the production stage.
Figura 2. As verificações de seleção devem levar em conta o tamanho do operador, o tipo de contato, a tensão da lâmpada, a cor, a classificação IP, o recorte do painel e a documentação.
Step 1: Establish whether you are measuring an existing hole or planning a new one
For retrofit work, remove the existing operator first and clean away paint burrs, gasket residue, label adhesive, and any deformation around the opening before measuring. The bare metal or bare enclosure material at the opening edge is the reference surface, not the old bezel or front face. Old holes in steel panels can become slightly oval after years of vibration or overtightening, so do not assume the legacy label describes the actual current condition.
For new panels, start from the manufacturer mounting drawing for the selected device family. The drawing will specify the nominal cutout diameter, the recommended tolerance, any anti-rotation slot or notch geometry, and the required panel thickness range. Use that drawing as the drilling or punching specification, not the headline product name.
Step 2: Measure hole diameter and panel thickness with proper tools
Use a vernier caliper with at least 0.1mm resolution. Measure the cutout diameter in at least three axes because service-worn or hand-drilled holes are often slightly oval. Compare the measured value against the drawing tolerance. A hole that is only marginally oversized may still affect sealing, anti-rotation engagement, and retaining nut torque.
Measure panel thickness at the cutout location, not at the edge of the enclosure. Sheet metal doors can vary in thickness across their face, particularly near bends or mounting flanges. The mounting barrel and retaining nut of a push button must engage correctly across the specified panel thickness range. If the door is too thick, the retaining nut may not reach full thread engagement. If it is too thin, the operator body may rock or loosen under vibration.
For control circuit devices such as push buttons and pilot devices, the applicable control-device standard is the primary reference standard for electrical performance and switching requirements. For ingress protection at the panel face, IEC 60529 defines the IP rating methodology. Both standards should be consulted alongside the product datasheet. The control-device standard context provides related context on how IEC product standards interrelate for industrial panel components. For distribution and motor circuit switches more broadly, the applicable control-device standard edition applies to switches, disconnectors, switch-disconnectors, and fuse-combination units for distribution and motor circuits, with rated voltage up to 1000 V AC or 1500 V DC.
Step 3: Check rear depth, device spacing, and sealing details
Confirm the rear clearance available behind the panel surface at each cutout location. The rear projection of the operator body, contact block stack, lamp holder if fitted, and wiring must all fit within the available enclosure depth. Many control panels benefit from a minimum of 20mm to 30mm of rear clearance as a practical starting point, but the device drawing for the specific model must define the final required value.
Check center-to-center spacing from adjacent operators, instruments, or enclosure folds. The retaining nut must rotate freely during installation, and terminals must remain reachable after all adjacent devices are installed. When a panel includes multiple operator types at mixed cutout sizes, calculate the spacing grid for each row and column separately rather than applying a single pitch across the full door.
If the application requires a front-panel IP rating, verify that the gasket seating surface is flat, clean, and free of paint overspray before pressing the operator through the hole. A distorted or contaminated seating surface can defeat the enclosure strategy even when the operator itself carries the correct ingress protection rating.
Common Panel Cutout Mistakes and How to Avoid Them
Most panel cutout problems are not caused by defective products. They result from small measurement omissions or workflow steps skipped under schedule pressure. The following failure modes appear repeatedly in panel-building practice.
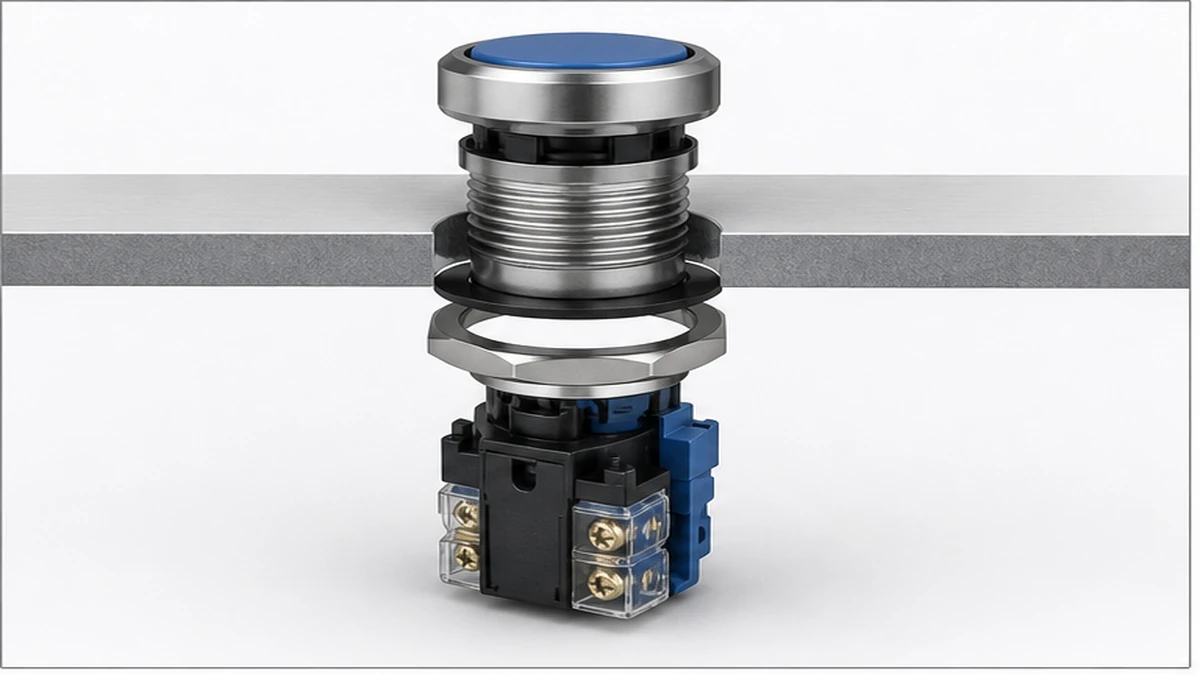
Figura 3. O contexto da fiação da aplicação deve ser verificado com base na tabela de contatos do fabricante antes da energização.
Assuming nominal size equals interchangeable fit
A product described as a “22mm push button” does not guarantee that every manufacturer or product series uses identical barrel diameter, bezel outside diameter, thread pitch, or mounting depth. Two 22mm operators from different product families may require different hole tolerances, gasket lands, or anti-rotation features. When mixing brands on a retrofit or switching from one product family to another on a new design, always obtain the mounting drawing for each specific model and compare them directly.
Selecting a panel material or thickness that falls outside the mounting range
Retaining nuts, anti-rotation rings, and sealing washers are designed for a specific panel thickness range. Installing a 16mm, 19mm, or 22mm operator in a panel that is too thick prevents full nut engagement. Installing it in a panel that is too thin leaves insufficient clamping force and allows the body to loosen under vibration or repeated operation. Confirm the panel thickness range from the product drawing before specifying panel material and finish.
Installing sealing components in the wrong sequence
For front-sealed or IP-rated operators, the gasket must be positioned between the operator body shoulder and the enclosure face before the device is inserted through the hole. A gasket installed on the wrong side, or omitted entirely under time pressure, will not provide the intended sealing effect. This is a common mistake when mixed personnel install operators on a panel that combines sealed and unsealed devices on the same door.
Ignoring rear accessory depth conflicts
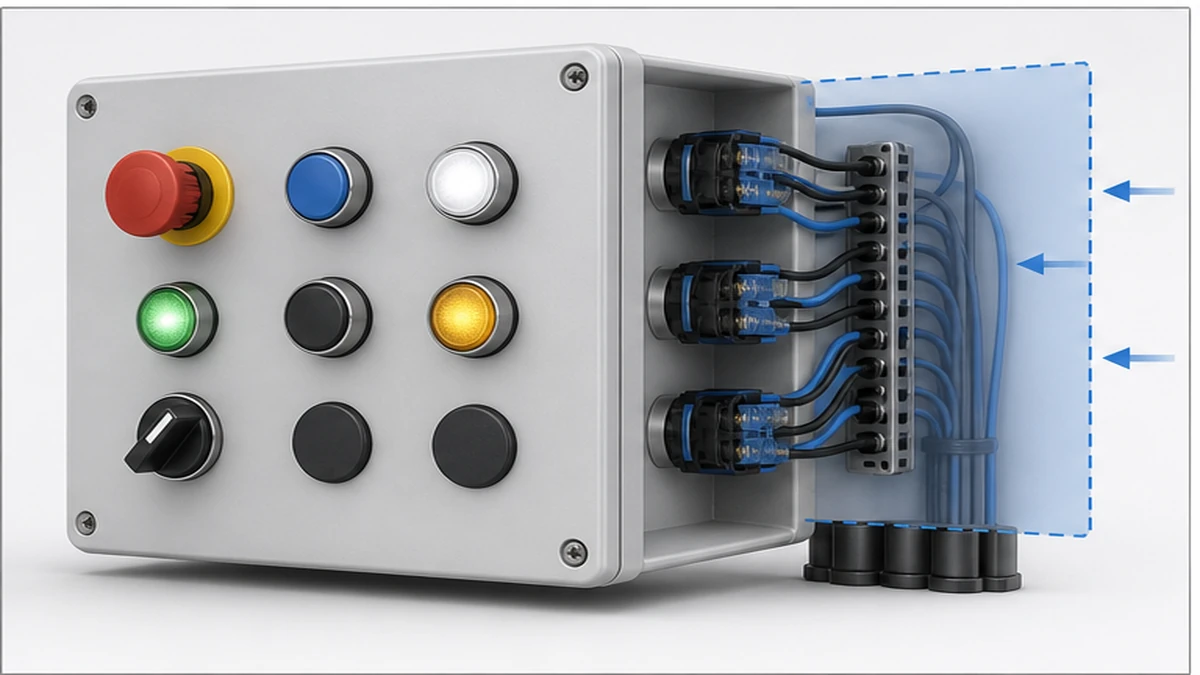
Contact blocks, lamp holders, and wiring harnesses all extend behind the panel. In a crowded enclosure, the rear projection of one row of operators can conflict with terminal blocks, wiring duct, or a nearby push button selection reference mounted in the same cabinet. Confirm total rear assembly depth for every operator position before the cutout layout is finalized, and compare depths for all devices in the enclosure together rather than one component at a time.
Skipping the pre-production panel check
A cutout pattern that looks correct in a drawing may reveal spacing issues, nut-access problems, or depth conflicts when the first physical panel is assembled. Building a pre-production unit and verifying retaining nut rotation, terminal access, and door closure before releasing the full panel layout to production avoids costly rework. This step is especially important when the panel combines 22mm metal-bodied operators with additional indicator lights or other front-panel components.
Overlooking paint buildup on retrofit panels
Existing paint or powder coat on a retrofit panel can add 0.2mm to 0.5mm to the effective panel thickness and reduce the clear internal diameter of the cutout. Remove paint from the seating land and the hole edge before measuring, and include that step in the retrofit procedure documentation.
Specifying 16mm, 19mm, and 22mm Push Buttons with Shieldhz
Shieldhz is the export brand of Zhejiang Shihe Electric Co., Ltd., a manufacturer founded in 2014 and located in Yueqing, Zhejiang, a region recognized for industrial electrical component production. The factory covers more than 5,000 square meters, employs more than 100 people, and operates more than 40 production machines. Certifications held by the company include ISO 9001, CE, RoHS, TUV, UL, UKCA, CCC, and CB, with applicability depending on the specific product and market.
Figura 4. Uma consulta completa deve incluir a classificação, a sequência de contatos, a montagem, o invólucro e os requisitos de documentação.
For push button selection involving panel cutout, mounting depth, contact program, and documentation requirements, Shieldhz applies a structured pre-production confirmation workflow. The steps below reflect how the engineering and sales team handles an inquiry for 16mm, 19mm, or 22mm operators.
What Shieldhz confirms before quotation or production
Cutout and operator family: The team identifies whether the required cutout is 16mm, 19mm, or 22mm and matches that to the appropriate product series, checking that the mounting drawing, barrel thread, bezel diameter, and anti-rotation feature are consistent with the buyer’s panel design.
Contact block program and wiring diagram: For each operator, Shieldhz confirms the required contact combination — normally open, normally closed, or combined — and verifies the contact block stack configuration against the wiring diagram supplied by the buyer. Contact program and function are confirmed from the product contact table, not assumed from the operator label.
Operating voltage and utilization category: The electrical parameters, including operating voltage, load type, and utilization category for control circuit devices under the applicable control-device standard, are confirmed from buyer inputs before the product is released for production.
Panel thickness and rear clearance: If the buyer provides the panel drawing or specifies the door material and thickness, Shieldhz checks that the selected operator’s barrel and retaining nut will engage correctly across that thickness range. Rear clearance requirements are flagged if the assembly depth may conflict with other enclosure components.
IP rating and sealing configuration: For applications requiring front-panel ingress protection, the team confirms the correct gasket and sealing ring configuration, and whether the product drawing supports the required IP class under IEC 60529.
Certificate and documentation package: Shieldhz prepares the relevant documentation set for the buyer’s market, which may include the product datasheet, mounting drawing, wiring diagram, test report, and applicable certificates. Buyers working with procurement or engineering approval processes should specify documentation requirements at the inquiry stage.
Buyer inquiry checklist for 16mm, 19mm, and 22mm push buttons
Providing the following inputs at inquiry reduces back-and-forth and accelerates model confirmation:
Required cutout size: 16mm, 19mm, or 22mm
Operator type: momentary, maintained, illuminated, or key-operated
Contact function: NO, NC, or combined; number of contact blocks if stacked
Circuit voltage and load type: for example, 24 V DC control circuit or 230 V AC
Panel constraints: door material, thickness, and rear clearance available
Environmental requirement: indoor enclosure, outdoor exposure, or IP65/IP67
Documentation needs: datasheet, mounting drawing, wiring diagram, certificate set
For panel builders and OEM buyers whose projects also include rotary switching components, the SH-B2 push button route and the GQ metal push button route represent related product lines that Shieldhz supplies from the same engineering and documentation workflow. Understanding selector switch reference can help panel designers make informed decisions when specifying both push buttons and rotary operators for the same enclosure.
O official IEC control-device publication is the key external reference for switches and disconnectors used in distribution and motor circuit applications, providing context for how panel control components fit within the broader IEC 60947 series.
Where Each Cutout Size Fits Best in Control Panels and Machines
Mapping each push button size to its most common application role makes the selection faster and reduces the chance of specifying a size that creates panel layout or usability problems later.
16mm: compact operator stations and dense control clusters
16mm devices suit applications where the available panel face area is limited and the function is straightforward, such as a start/stop command, a reset signal, or a status acknowledgment. They are common in compact selector switch clusters, small junction box control stations, and retrofit panels where existing enclosures have constrained front-face dimensions.
Because the bezel and barrel are smaller, 16mm operators can be grouped at tighter center-to-center spacings than 22mm devices, which is an advantage in multi-function strips. The practical tradeoffs are reduced legend plate area, less finger clearance for gloved operators, and in some series, fewer accessory options in the rear contact block range.
19mm: general-purpose industrial panels and OEM assemblies
19mm push buttons often suit mixed-function control cabinets and OEM assemblies where layout density is important but not extreme. The format provides better usability than 16mm without consuming as much front-panel real estate as 22mm. It is a practical choice when the panel must accommodate several different operator types — push buttons, selector switches, and indicator lights — in a layout that reads clearly without being oversized.
Availability of legend holders, lamp options, and contact block combinations in the 19mm format varies by product series, so confirm the required accessory program before specifying 19mm as a standard across a product range.
22mm: machine control fronts, operator pendants, and glove-access stations
22mm operators are widely used on machine-control front panels, operator pendants, and field-facing stations because the larger head is easier to locate, easier to press with gloved hands, and easier to label with large, readable legends. The deeper accessory stack behind a 22mm operator also accommodates more complex contact configurations and lamp options.
For metal-bodied applications, a product like the SH-GQ metal push button switch offers the physical robustness suited to industrial machine interfaces. The additional panel area required by 22mm operators and their wider spacing must be accounted for during panel layout, and the rear accessory stack depth must be checked against available enclosure depth before the cutout grid is finalized.
Environment and standards cross-check
Regardless of cutout size, verify the following before ordering:
the applicable control-device standard compliance for control circuit device electrical performance
IEC 60529 IP rating for the enclosure front-panel sealing requirement
Panel thickness within the range specified on the product mounting drawing
Rear assembly depth compatible with available enclosure interior space
Certificate documentation matched to the target market and approval authority
If the project includes changeover or isolation switching alongside push button operators, reviewing control-device standard context provides useful context for how different switching functions interact within the same panel design.
Perguntas frequentes
What hole size should I drill for a 22mm push button?
The nominal cutout is 22mm, but the exact drilling or punching dimension, including recommended tolerance and any anti-rotation slot geometry, must come from the product mounting drawing. Small tolerance differences between manufacturers and series can affect fit, sealing effectiveness, and anti-rotation performance. Do not use the nominal size as the final drill specification without checking the drawing.
Is a 19mm push button a reliable compromise between 16mm and 22mm?
Yes, in many panel layouts 19mm provides better operator usability than 16mm while using less front-panel space than 22mm. It is a practical choice for mixed-function control cabinets and OEM assemblies. Confirm that the required operator style, contact block program, legend holder, and lamp option are all available in the 19mm format for the specific product series before standardizing on it.
Can I install a push button in a cutout that is slightly oversized?
An oversized cutout can allow the operator to rotate under use, prevents the sealing gasket from making full contact, and reduces the clamping force of the retaining nut. In some cases an approved adapter plate or repair insert can restore correct mounting conditions, but the preferred approach is to correct the cutout to the specified tolerance rather than force the device into an ill-fitting hole.
How much rear clearance do 16mm, 19mm, and 22mm push buttons typically need?
Rear clearance requirements depend on the operator body depth, the number and type of contact blocks attached, whether a lamp holder is fitted, and the minimum wire bend radius for the conductors used. As a practical starting estimate, many panel designs allow 20mm to 30mm of rear clearance behind the mounting surface, but the device mounting drawing must define the minimum required value for the specific model and contact stack combination.
Do all products within a 16mm family share the same mounting dimensions?
No. The “16mm” designation identifies a size family, not a guarantee of interchangeable geometry. Barrel length, thread pitch, bezel outside diameter, and sealing part configuration can differ between manufacturers and between product series from the same manufacturer. Always obtain and compare the mounting drawing for the specific model before assuming dimensional compatibility with an existing panel layout or another brand.
Why does panel thickness affect push button selection?
The retaining nut must achieve sufficient thread engagement across the door thickness to clamp the operator securely and compress the sealing gasket. A panel that is too thick prevents the nut from reaching full engagement. A panel that is too thin provides insufficient clamping force, which can allow the operator to rock, loosen under vibration, or fail to maintain front-panel sealing. The allowable panel thickness range is a datasheet and drawing specification, not a value that can be assumed from the product name.
Which standards are most relevant when specifying industrial push buttons for a control panel?
the applicable control-device standard is the primary standard for control circuit devices including push buttons and related switching elements, covering electrical performance, contact ratings, and utilization categories. IEC 60529 defines ingress protection ratings and is essential when the panel installation requires a specific IP class at the front face. Both standards should be applied alongside the manufacturer datasheet and mounting drawing for each selected product.
Shi, Muxi
Shi, Muxi escreve artigos técnicos da Shieldhz para compradores de controle industrial e componentes elétricos, abrangendo chaves de came rotativas, chaves isoladoras, seccionadores PV DC, botões de pressão, luzes indicadoras, gabinetes à prova d'água e blocos de terminais. Os artigos são baseados na experiência de fabricação e exportação da Zhejiang Shihe Electric Co., Ltd., com ênfase prática na seleção de modelos, planilhas de dados, desenhos, certificações, classificações de IP e detalhes de consulta que os compradores devem confirmar antes de fazer o pedido.